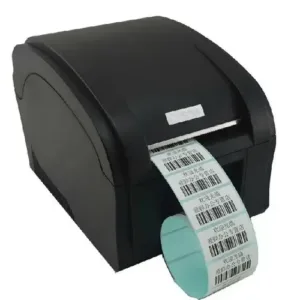
If your barcode prints look faint, patchy, or hard to scan, the problem is rarely the printer alone. Print quality depends on several connected factors, including supplies, printer settings, and environmental conditions.
These include the barcode printer, the ribbon, the label, the resolution, and even the room the printer operates in.
This guide explains the key factors that affect barcode print quality and how to fix common printing problems. By the end, you will understand why your prints look poor and what to change to correct them.
Why Barcode Print Quality Matters More Than You Think?
Poor barcode print quality is not just a cosmetic issue. It causes real problems. Some of them are as follows:
- Scanners fail to read codes.
- Labels smudge or fade during handling.
- Shipments get delayed.
- Inventory errors increase.
Most barcode printers are capable of sharp output. When print quality drops, the cause is usually mismatched supplies, incorrect printer settings, or a lack of maintenance.
Understanding How a Barcode Printer Actually Prints
Before diving into fixes, it helps to know the basics.
A barcode printer works by applying controlled heat through the printhead. That heat either:
- Activates a heat-sensitive label in direct thermal printing, or
- Transfers ink from a ribbon onto a label in thermal transfer printing
In both printing methods, the printer must apply the correct heat level, pressure, and timing to transfer ink evenly onto the label surface. If any one factor is off, print quality drops fast.
Barcode print quality is evaluated using international standards such as ISO/IEC 15416 for linear barcodes and ISO/IEC 15415 for two-dimensional symbols. These standards define how barcode contrast, edge sharpness, reflectance, and printing defects are measured to confirm that scanners can read the barcode consistently.
GS1 General Specifications use ISO barcode-verification standards to define how barcodes should be printed and checked so they scan correctly in retail and logistics environments.
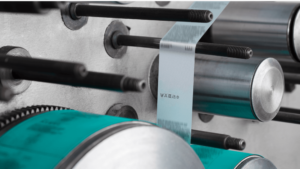
Ribbon Types and Their Impact on Print Quality
Thermal transfer ribbons are one of the most common sources of print issues. Many problems come from using the wrong ribbon for the label or application.
Main Types of Thermal Transfer Ribbons
Ribbon Type | Best Used With | Durability | Common Issues |
Wax | Paper labels | Low | Smudging, fading |
Wax-Resin | Paper and some synthetics | Medium | Needs correct heat |
Resin | Synthetic labels | High | Poor print if the heat is low |
Wax Ribbons
Wax ribbons melt at low temperatures. They are ideal for basic paper labels used indoors. They print easily but scratch and smear quickly. If you use wax ribbon on synthetic labels, the barcode often looks dull or incomplete.
Wax-Resin Ribbons
Wax-resin ribbons sit in the middle. They need more heat but produce sharper lines. They are a good choice when labels face light handling or mild moisture. Many businesses switch to wax-resin ribbons when paper labels begin to smudge, or scanners struggle to read printed barcodes.
Resin Ribbons
Resin ribbons are designed for tough environments. They bond strongly to synthetic labels. These ribbons require higher heat and slower print speeds. If the settings are wrong, the print may look faded even though the ribbon is premium.
Why Label Material Changes Everything?
Label material directly affects how well ribbon ink transfers and how long printed barcodes remain readable. A high-quality ribbon cannot fix a poor label surface.
Commonly Used Barcode Label Materials
Label Material | Typical Use | Ribbon Compatibility |
Paper | Shipping, retail | Wax, Wax-Resin |
Polypropylene | Retail, logistics | Wax-Resin, Resin |
Polyester | Industrial, chemical | Resin |
Paper Labels
Paper labels accept ink easily. They work well for short-term use. It absorbs heat quickly, which is why wax ribbons perform well on them. However, paper labels are sensitive to moisture and abrasion.
Synthetic Labels
Synthetic labels resist water, heat, and chemicals. Their surface is harder. These labels require higher heat settings and stronger ribbon bonding to produce clear barcode edges. When wax ribbon is used on synthetic labels, the printed barcode may appear light or incomplete, making it difficult for scanners to read.
GS1 guidelines stress that barcode contrast and durability must remain consistent for reliable scanning.
DPI Explained: 203 vs 300 vs 600 DPI
DPI means dots per inch. It describes how many dots the printer can place in a single inch of print. Higher DPI produces finer detail. Higher DPI also requires correct ribbon, label material, and printer calibration to maintain consistent output.
Common Barcode Printer DPI Options
DPI | Typical Use | Pros | Cons |
203 | Shipping, cartons | Fast, low cost | Less detail |
300 | Product labels | Sharper barcodes | Slower speed |
600 | Electronics, small codes | Excellent clarity | Higher ribbon use |
When DPI Causes Print Quality Issues?
Low DPI struggles with small barcodes and dense data because fewer dots are available to form clean bar edges. Bars can blur together, which makes scanning unreliable. High-DPI printers can also cause problems if ribbon, labels, or settings are not matched, since more dots require more precise heat control.
Barcode sizing standards help explain this relationship. GS1 barcode specifications define the X-dimension, or the width of the narrowest bar, as a key factor in print quality and scanner readability. When barcodes are printed at smaller X-dimensions, higher printer resolution is needed to reproduce bar edges accurately and maintain contrast.
Most barcode applications print reliably at 300 DPI, while higher resolutions such as 600 DPI are typically used when barcodes are very small or contain dense information. This allows the printer to reproduce narrow barcode elements with clearer edges and proper spacing.
Printer Settings That Directly Affect Print Quality
Even when ribbon and label materials are correct, incorrect printer settings can reduce barcode contrast and clarity.
Key Settings to Check First:
- Darkness or heat level
- Print speed
- Printhead pressure
- Media calibration
GS1 placement guidelines clearly state that barcodes should be printed at full height and should not be truncated to fit packaging, and that a blank “quiet zone” must be maintained around the symbol for reliable scanning
Darkness and Heat
Too little heat causes faded prints. Too much heat causes smudging and ribbon wrinkles. Always adjust darkness in small steps. Large jumps often make problems worse.
Print Speed
High speed reduces the time heat is applied. This often leads to light or broken bars. If print quality drops at high speed, slow the printer down before increasing heat.
Calibration
Calibration tells the printer where each label starts and ends. If calibration is wrong, prints shift, cut off, or vary in darkness across labels. Running calibration often restores label alignment and consistent print density across labels.
Printer Maintenance and Wear Issues
Barcode printers need regular care. Skipping routine cleaning allows residue and dust to build up on the printhead, which reduces print clarity over time.
Common Maintenance Problems
- Dirty printhead
- Worn platen roller
- Dust inside the printer
A dirty printhead causes white lines through barcodes. Cleaning with approved wipes often restores print quality immediately. Whereas a worn roller leads to uneven pressure, which shows up as patchy prints.
Environmental Conditions You Should Not Ignore
Environmental conditions such as temperature, humidity, and dust directly affect ribbon transfer and label performance. Even a well-configured barcode printer can produce inconsistent results if labels and ribbons are exposed to heat, cold, or moisture outside their recommended range.
Temperature and Humidity
High humidity affects ribbon transfer and label adhesion. Cold environments require higher heat settings. So, labels and ribbons should be stored in stable conditions. Sudden temperature changes can cause condensation, label curling, or uneven ribbon transfer before printing starts.
Dust and Air Quality
Dust particles settle on the printhead and platen roller, creating gaps or white lines in barcodes. In warehouses or production floors, poor air quality accelerates printhead wear and reduces print consistency over time.
Storage and Handling Practices
Improper storage, such as stacking labels near windows or heaters, degrades coating and adhesive quality. Ribbons exposed to light, heat, or pressure can wrinkle or lose ink transfer efficiency before they are ever installed.
Static Electricity and Dry Air
Very dry environments increase static buildup, which can cause labels to misfeed or stick together. Static also affects sensor accuracy, leading to misalignment and inconsistent print positioning.
What Your Print Defects Are Telling You?
Print defects usually tell you exactly what is wrong.
Defect | Likely Cause | First Fix |
Faded print | Low heat or speed too high | Increase darkness |
Smudging | Too much heat | Reduce darkness |
Vertical white lines | Dirty printhead | Clean printhead |
Uneven print | Worn roller | Replace roller |
Start troubleshooting by adjusting heat settings and cleaning the printhead before replacing supplies or hardware. Many problems may not require new hardware.
Steps to Choose the Right Supplies
- Identify label material – Start by confirming whether you are using paper or synthetic labels. Label material determines how much heat is needed and which ribbon types will bond correctly to the surface.
- Match ribbon type to label – Choose a ribbon that is designed for your label material. Wax works best on paper, while synthetic labels require wax-resin or resin ribbons to prevent smudging and premature wear.
- Choose DPI based on barcode size – Small or high-density barcodes need higher DPI to maintain clean bar edges. Larger shipping or carton labels usually print reliably at lower DPI without affecting scan performance.
- Calibrate the printer – Run calibration so the printer correctly detects label gaps and ribbon movement. This ensures consistent print placement and even darkness across every label.
- Adjust speed and darkness gradually – Make small changes to print speed and heat rather than large jumps. Slowing the printer often improves clarity without increasing heat, which helps protect the printhead and ribbon.
This order prevents trial-and-error frustration.
Small Business vs Industrial Use Cases
Small businesses often use paper labels with 203 or 300 DPI printers. Print quality issues usually come from settings or low-grade ribbons.
Industrial users rely on synthetic labels and resin ribbons. Their problems are more often linked to speed, environment, or maintenance cycles.
The barcode label printer setup should always reflect how and where the label will be used.
Final Thoughts
Barcode print quality problems usually follow predictable patterns related to supplies, settings, or maintenance. It reflects choices made across supplies, settings, and maintenance.
When ribbon, label, DPI, and printer settings work together, barcodes print clean and scan fast. When one element is wrong, problems appear immediately.
Treat your barcode printer as a system, not a single device. That mindset fixes most print quality issues before they become costly.
Frequently Asked Questions
1. Why is my barcode printing faint?
This usually means the heat is too low or the print speed is too high. It can also indicate ribbon and label incompatibility.
2. How does DPI affect scanning accuracy?
Higher DPI creates cleaner bar edges. This improves scanner recognition, especially for small or dense barcodes.
3. Which ribbon should I choose for synthetic labels?
Resin ribbons are the correct choice for most synthetic labels. Wax ribbons rarely bond well to these surfaces.
4. Can a barcode printer lose quality over time?
Yes. Printheads wear out, rollers harden, and dust builds up. Regular cleaning and inspection prevent a gradual decline.